Module: Project Administration Applet: Rate Schedules |
|
Description: How to add a Rate Schedule.
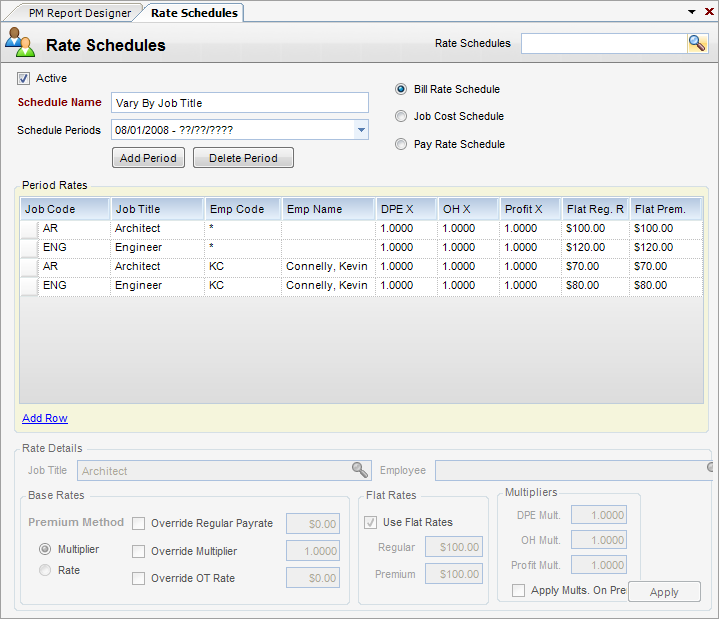
Step 1 - Add a name by clicking the New button located on the toolbar. Then select a schedule type (job cost or bill rate). Enter a Schedule Name, a Start Date (this will be the effective start date of your Rate Schedule.), and click Create.
Note - The date range ends in question marks because there is no end date for the schedule.
Step 2 - Start adding rows. To add a row click on the Add Row link and then fill out the row details.
Step 3 - When done, click Apply to move the row into the grid. If you need to go back and edit a row click on the gray cell at the far left of the row you wish to change.
