Overview
How to write an A/P Check. Check processing is a three-step procedure. Please note, check writing uses a wizard-type form where next and previous buttons navigate between the steps.
Tutorial
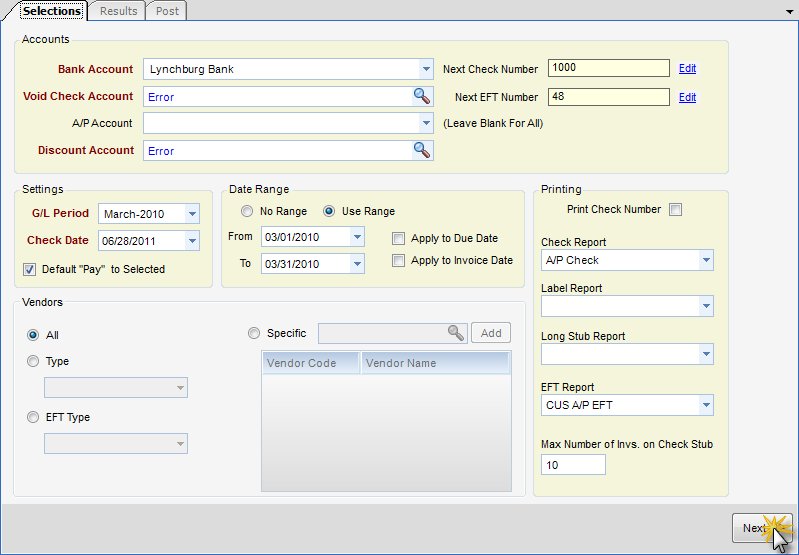
Step 1 - Fill out the Selections tab with the appropriate information. The Selections tab includes the settings that will determine which invoices are to be processed.
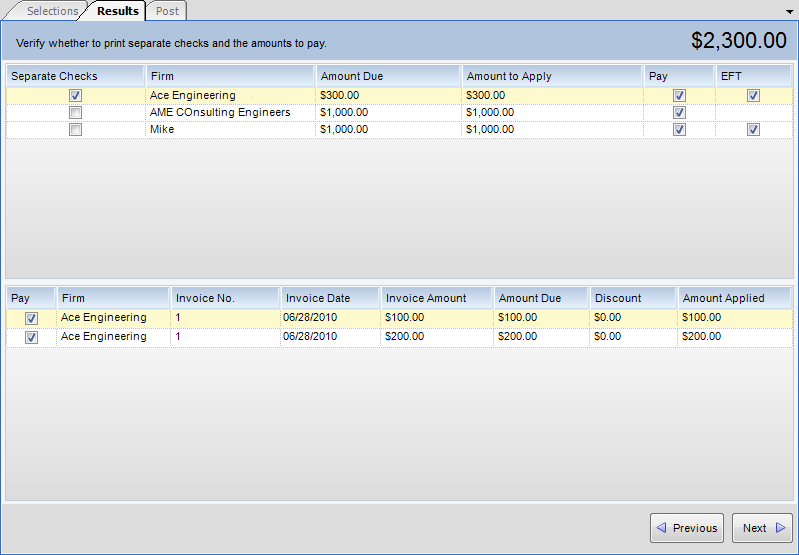
Step 2 - Fill out the Results tab with the appropriate information. In the Results tab, you will see a list of vendors (Firms) and respective invoices that were found, based on the settings from the selections step. In this step you can alter what invoices you want paid, how much you want to pay, pay as an EFT, and whether to print a separate check for each invoice.
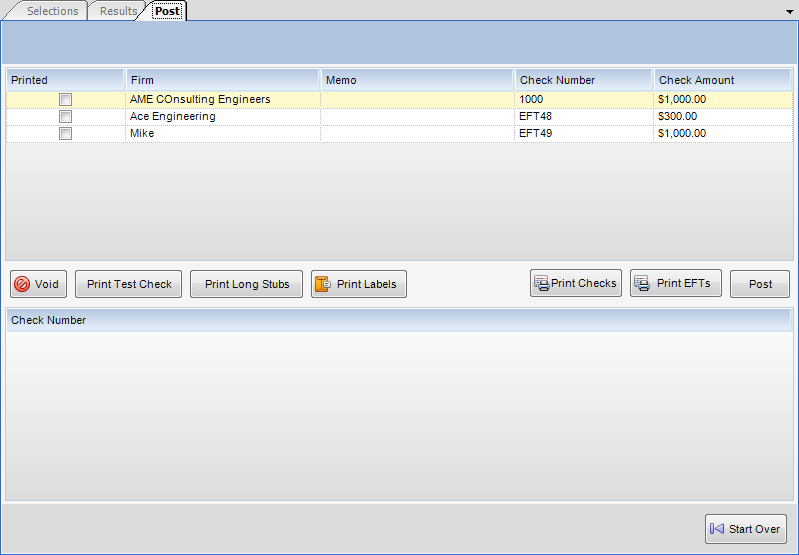
Step 3 - Make sure that the Post tab is displaying the appropriate information. You may fill out the Memo box here if desired. Click Print Checks or Print EFTs. On the Post tab, you can print, post, or void checks. If you are happy with the printed checks/EFTs, click Post to post them to the Disbursement journal. Once you post, the EFT file is generated. If you would like to modify the EFT file, go to the EFT Files applet located in Utilities.
References
Please browse to the following links for more information regarding the discussion above.
![]()