Overview
How to Create an Invoice. Once the sections are designed, they must be put together to form an invoice design. Invoice designs are then assigned to projects. Invoice designs can be labor only, expense only, or combined (both labor and expense). Designs can be created and edited on the Invoice Designs tab.
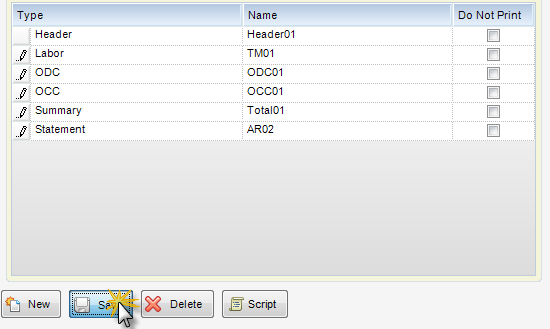
IMPORTANT: The Delete button at the bottom of the screen deletes the Invoice Design, not the sections in the grid. Only use the Delete button if you want to remove the Invoice Design from the Invoice Design screen.
Step 1 - Click the New button located at the bottom of the Invoice Designs Tab.

Step 2 - Fill out the appropriate information regarding the invoice being created. Details listed below.
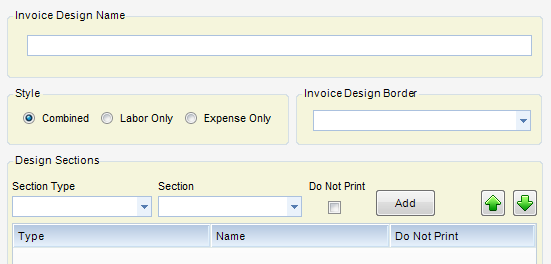
Invoice Design Name - Name of design
Style
| • | Combined - When checked, design for labor and expense. |
| • | Labor Only - When checked, design is for labor. |
| • | Expense Only - When checked, design is for expense. |
Invoice Design Border - Border design invoice will use. Required to save.
Design Sections
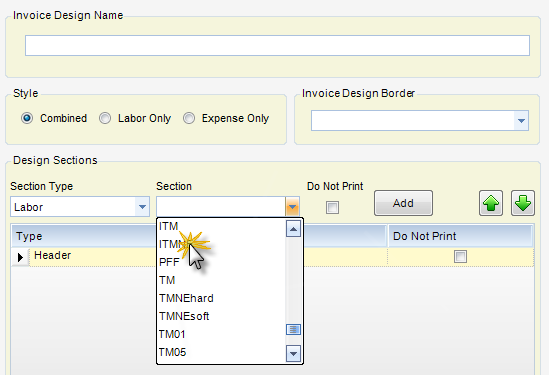
| • | Section Type - Type of section to add. All but coversheet and border can be used. |
| • | Section Name - Section to add. Filtered by section type. |
| • | Do Not Print - When checked the section will not print but can post. |
| • | Add - When clicked the design section is added to the list. |
Note: You can remove a section from the design by selecting it in the grid and hitting the Delete key on your keyboard.
Step 3 - Add the sections to include in the invoice design (for example, Header, Labor, Summary). This is done by selecting the Section Type and then choose the section. Click Add and the section will show up in the grid. Continue until all sections appear in the grid.
Note: Sections can be rearranged by highlighting the section to be moved and using the two green arrows.
Step 4 - Click Save