Overview
User-defined fields can be created for the following applets in InFocus: Clients, Employees, Vendors, Projects, and Contacts.
Note: While in one of the five setup screens listed above, a UDF Designer button will appear on the toolbar (with proper permissions). You can also access any of the UDF designers from the UDF Designer applet located in the Administration module.
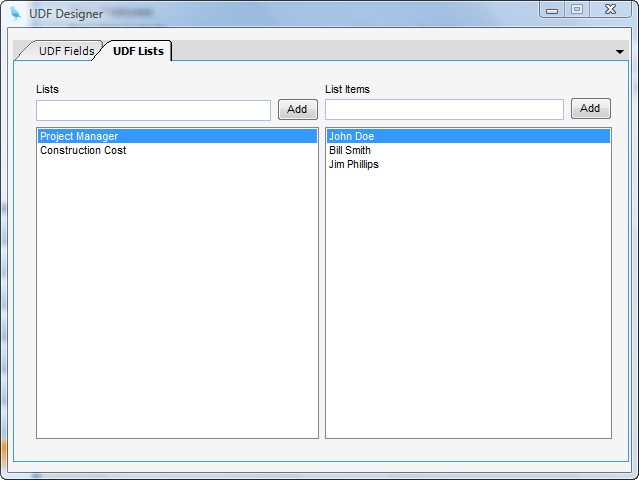
Step 1 - To use a list, first create the UDF list; otherwise, skip to step 2. UDF Lists provide drop-down lists for UDF fields. Lists are non-restrictive in that a user can still enter a value that is not contained in the list. Lists are maintained in the UDF Lists tab of the UDF Designer.
Add/Edit a UDF List
| • | To add a list, enter a list name in the Lists box and click Add. |
| • | To rename or delete a list, right-click on the list name and choose the appropriate action. |
| • | To add items to a list, first select the list from the list of Lists. Next, add an item in the List Item box and click on Add. |
| • | To rename or delete a list item, right-click on the list item and choose the appropriate action. |
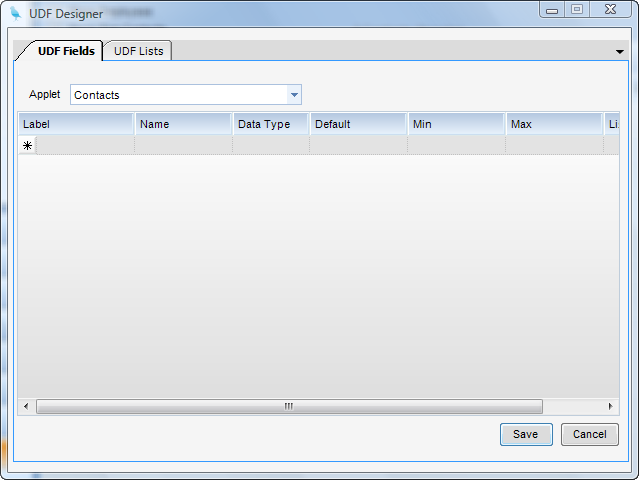
Step 2 - UDF fields can be added, modified, or changed from the UDF Fields tab in the UDF Designer. Fields are added or modified in grid format. To delete a UDF field, highlight the row and hit the Delete key.
Add a UDF Field
Fill out the following fields:
| • | Label - This is the field label that will appear on the form next to the field. |
| • | Name - This is the name of the field as it will appear in the associated UDF table in the database. Names cannot include punction marks (including spaces). |
| • | Data Type - Type of data that is expected: Character, Integer, Numeric, Boolean (True/False), Date, and Date Time (includes both date and time). |
| • | Default - Default value for new records (optional) |
| • | Min - Minimum allowed value (optional) |
| • | Max - Maximum allowed value (optional) |
| • | List - UDF List to use for quick entry. This is the list that was created in step 1. |
Step 3 - Click Save when finished and the Vendor section will be rebuilt to contain the UDF Field.