Overview
How to Create a New Import.
Step 1 - Go to the Import Utility applet and click New Import.

Step 2 - Fill out the Import Name and Comments sections in the Header.

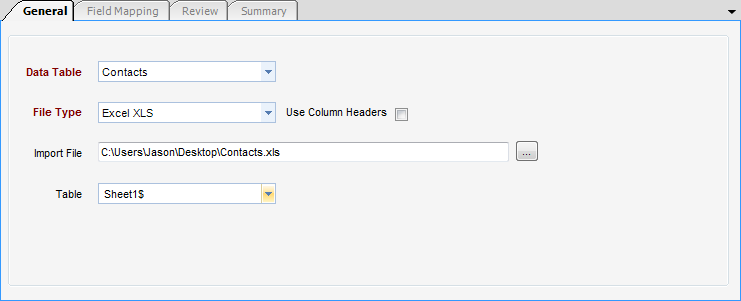
Step 3 - Select the appropriate information on the General tab and click Next.
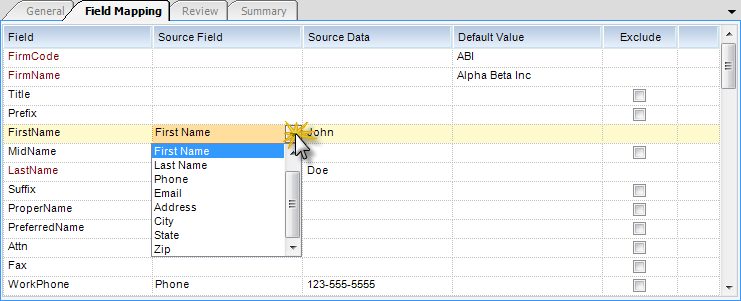
Step 4 - Fill out the appropriate information on the Field Mapping tab and click Next.
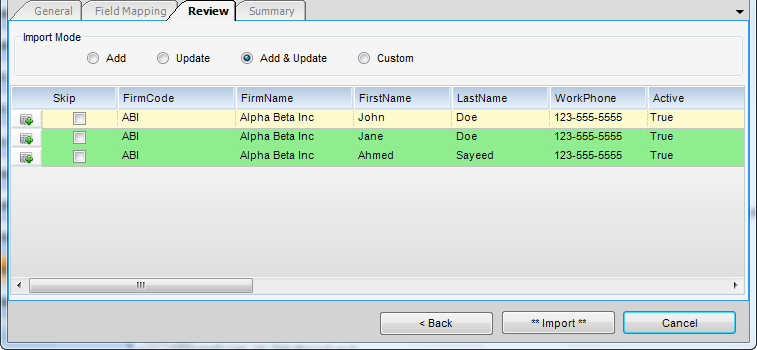
Step 5 - Review the information being imported on the Review tab. If it is correct, click Import.
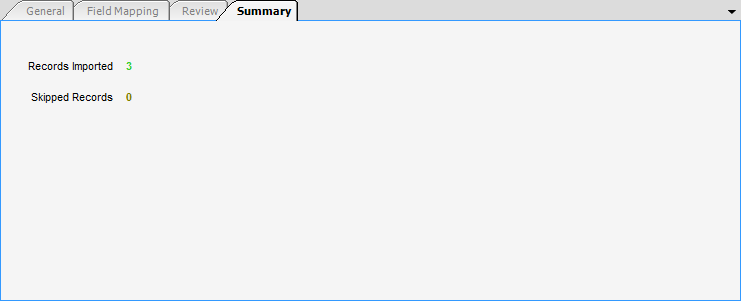
Step 6 - Clicking Import will direct the user to the Summary tab, which shows the records imported and the records skipped.
Step 7 - To save the import, click the Save Import button located in the toolbar.
