|
Overview
The Projects Toolbar gives the user (if given the appropriate permissions) numerous capabilities within the Projects applet. Below is a list of those capabilities.

1) Toolbar Buttons
| • | New - Creates a new project. |
| • | Copy - Copies the current project. |
| • | Save - Saves the current Vendor Information that has been entered. |
| • | Delete - Deletes the current project. |
| • | UDF - Opens the UDF designer where custom fields are designed. To design a UDF, see the How to Create a UDF section of this manual. |
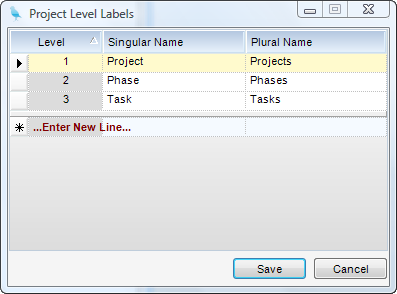
| • | Project Level Labels - Project level labels are used to assign a familiar name to each level of the WBS. To maintain the labels, click on Project Level Labels on the tool bar. A grid with three columns (shown below) will appear. Fill out the information and click Save. |
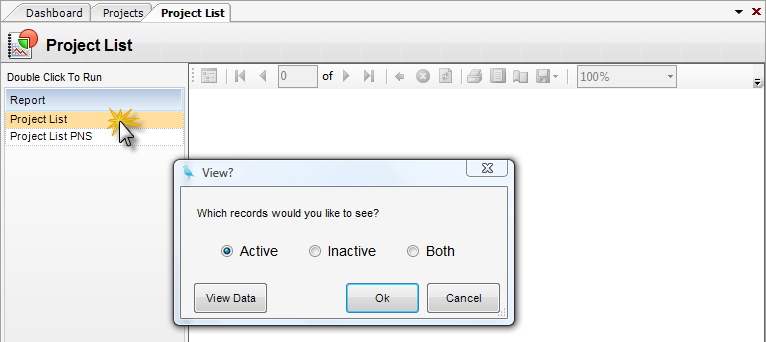
| • | Print All Projects - When clicked, the user is directed to the Vendor List report. When you double-click on Vendor List, the following box pops up, allowing you to choose active, inactive, or all Vendors in your system. After choosing the type of Vendor, hit OK and you will see a report listing the vendors. |

2) Tools Button

| • | UDF Designer - Brings up the UDF designer. See How to create a UDF to understand more about this. |
| • | Project Level Labels - Project level labels are used to assign a familiar name to each level of the WBS. To maintain the labels click on Project Level Labels on the tool bar. You will get a grid with three columns (Shown Below). Fill out the information and Save. |
Grid Descriptions for Project Levels Label.
| • | Level - Project Level. One is the first level. |
| • | Singular Name - Singular form of level name. |
| • | Plural Name - Plural form of level name. |

|


