Description: How to manually set up historical amounts (Received to Date).
Using the Revenue Analysis Report, we will monitor this change. First we look at the report before the change. (Fig.1)
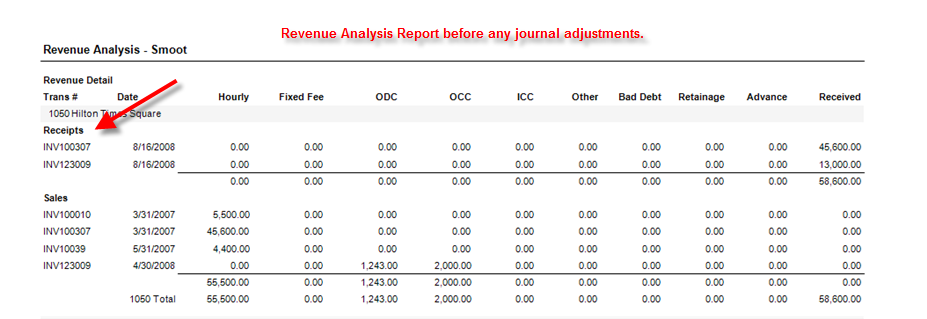
(Fig.1)
Step 1 - To begin setting up historical amounts (Received to Date), first, go to the Receipts Journal and create an entry for the historical amount. Fill in the appropriate Header information, and create a Detail line for each Project you wish to change. Select the Billed Labor G/L Account that you need to go against and enter the amount you wish to add (positive amount). Once all of the projects that you wish to change have been entered, create a final Detail line that goes against an Error Account. This should be an offsetting entry (negative amount to zero-out the total transaction amount). Finally, make sure that the Amount at the top-right is set at $0.00. Click Save. (Fig.2)
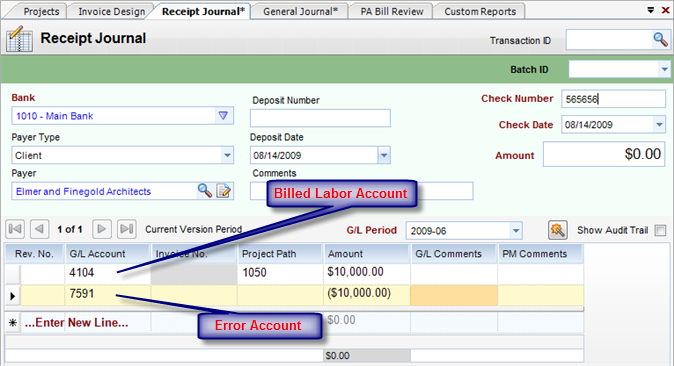
(Fig.2)
Step 2 - Next, go to the General Journal and create another entry for the historical amount. Start by creating a Detail line that goes against the Error Account (same one used in Fig.2). This should be the offsetting entry (negative amount to zero-out the total transaction amount) that you used in the first journal entry (Fig.2). Then, create a Detail line for each Project you used in the first journal entry (Fig.2). Select the same Billed Labor G/L Account and enter the amount(s) you wish to add (positive amount from first entry). Once all of the projects that you wish to change have been entered click Save. (Fig.3)
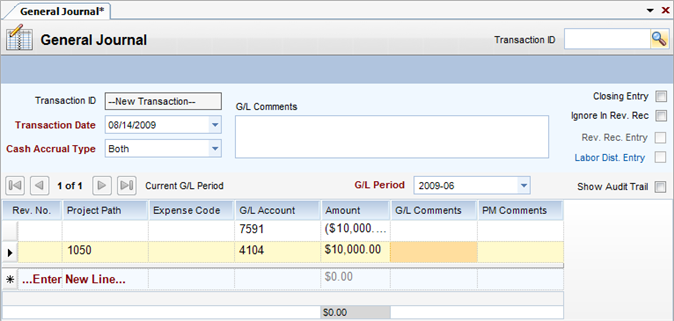
(Fig.3)
Looking at the Revenue Analysis Report - Looking at the report, we see that the Historic Amount (Received to Date) has been changed to reflect the new amount. (Fig.4)
