Module: Personal Applet: Timesheets |
|
Description: Timesheets are usually entered by employees or sub-contractors. However, timesheet administrators (with special rights) can also enter them.
Timesheets are usually grouped into period coverage dates of one week. Employees are encouraged to enter their time on a daily basis so it will be immediately available in project management reports.
Employees submit their timesheets after completion. Once a timesheet has been submitted, it can no longer be changed until it reaches accounting. The employees’ manager (either the timesheet approver or the alternate) can either approve or reject the timesheet. If rejected, the employee can make changes and re-submit. If approved, the timesheet becomes the province of accounting. A timesheet can be rejected by Accounting back to either the approver or the employee. The timesheet can also be adjusted by Accounting (in Timesheet Adjustments). Once adjusted, it can no longer be rejected. The original version of the timesheet, as entered by the employee, is preserved. This will be the only version visible to the employee.
Work Orders is an important concept in Timesheets. Work Orders can be sent to an employee to perform a unit of work. All the detail (WBS Path, Job Title, etc.) necessary to fill out the timesheet line, except for hours and date, has already been imbedded in the Work Order. It frees employees from having to know WBS paths and contractual or billing information.
When employees submit timesheets, they may have to enter an Estimate to Complete in hours for WBS paths or work orders cited in the timesheet. An Estimate to Complete is dependent on being allowed in Global Settings, and is then flagged on either the WBS path or the work order.
Fields Listed Below
Timesheet Fields are as follows:
Recent Projects Link - Clicking on this button displays a list of projects on which the employee has recently worked. The employee checks off which projects to apply to the current timesheets. Projects the employee has worked on in the last 30 days are considered Recent Projects. By default, projects are sorted in descending order by the last day on which they were worked.
Scheduled Projects Link - Shows a distinct list of scheduled projects based in the supplied data range. You can select projects from this pop-up.
Recent Projects Link - Shows a view of projects recently worked on. You can select projects from this pop-up.
Note when a Work Order is used: When a Work Order is used, the project (WBS) path, the labor code, and the job title will fill out automatically. The project cannot be overridden.
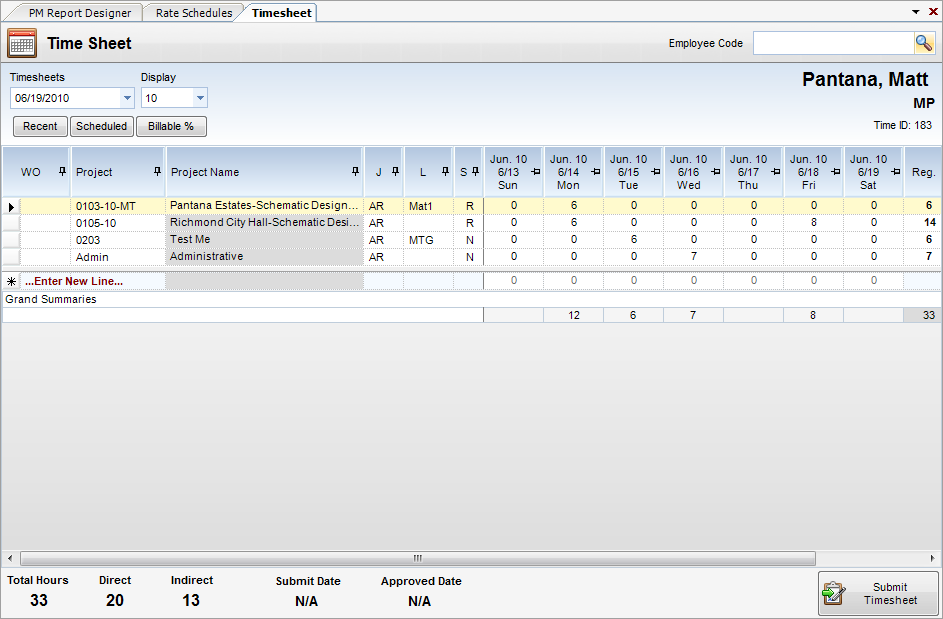
| • | Project - WBS path. Only allowable projects can be used An allowable projects is determined by a project active flag, timesheet allow date entry, profit center membership, and, potentially, a project team membership list. The lookup for this field is split into two sections. The top section is used to select a Bill Terms Node (project). Once selected, the bottom section lists the allowable WBS nodes. |
| • | J - Job Title field. Shows the allowable job titles. |
| • | L - Labor Code field; shows only if enabled in Global Settings. |
| • | S - Bill Status field; shows only if enabled in Global Settings. |
| • | Days of the Week - Regular hours (non-overtime) worked for WBS on a given day. |
| • | Reg - Total regular hours for line item. |
| • | OT - Total overtime hours for line item. |
| • | Total - Total hours for line item. |
Note 1: Hit the O key to enter Overtime hours. This will bring up the Overtime pop-up. Both regular and overtime hours for the Day cell can be entered here. Checking the Apply to All Work Days box in the pop-up will replicate the entry to all work days. When the pop-up is closed, the regular hours will show in the Day cell, but the overtime hours will be included in the OT total. Any cells that contain overtime will appear with red text if the line is not selected. Alternately, select OT Hours from the View menu on the toolbar to have overtime columns for each day.
Note 2: Entering comments is similar to entering overtime. Strike the C key from any Day cell to bring up the Comments pop-up. Like the OT pop-up, there is a check box to replicate the comment to all week days. When a day cell has a comment, it will have a yellow background color instead of the normal white. Only the yellow will be visible if the line is not selected.
To see the project name in the grid, select Project Name from the View menu in the toolbar.