Overview
The following steps will take you through the creation of a Project Role. You will also learn how to assign it to a project.
Step 1 - First, go to Global Settings / List Management. In the list, select Project Roles. If this is your first time doing this, there will be nothing in the list. Enter the name of the Project Role(s) that you want. The ID will fill in itself. (Fig.1) Click Save.
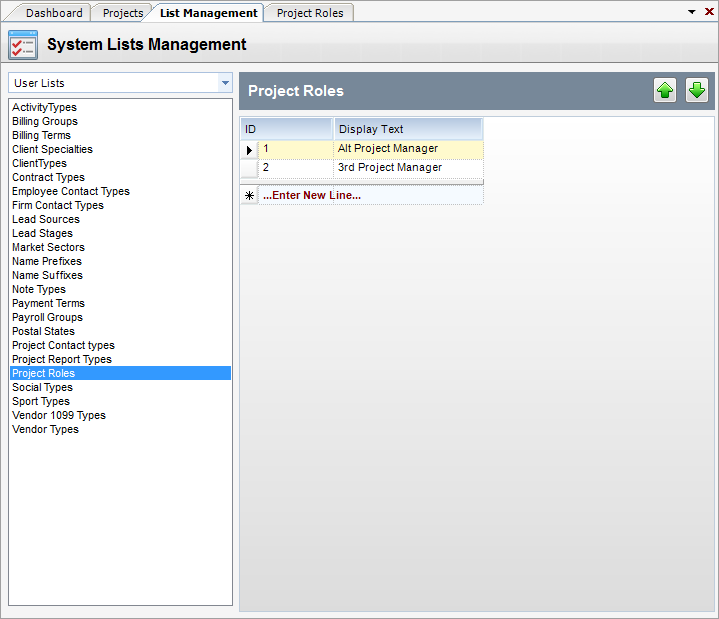
(Fig.1)
Step 2 - Next, go to Global Settings / Project Roles. (Fig.2) In the column name Role, you will see the names of the project roles that you created. On the right, you see five tabs named Applet, PM Reports, Custom Reports, Alerts, and Queries. Go to each of these tabs and grant permissions for the user with this Project Role to have access to. When you are done checking the boxes, click Save.
Note: In order for Custom Reports to show up on the Custom Reports tab, they must have the Use in Project Roles checkbox checked. (Fig.3)
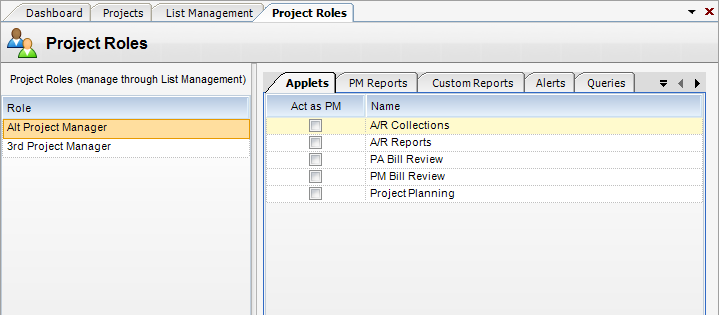
(Fig.2)
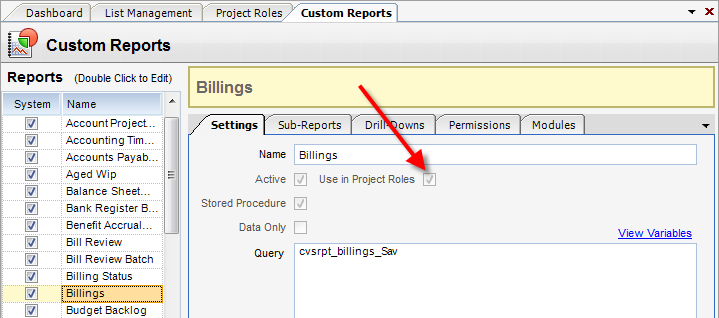
(Fig.3)
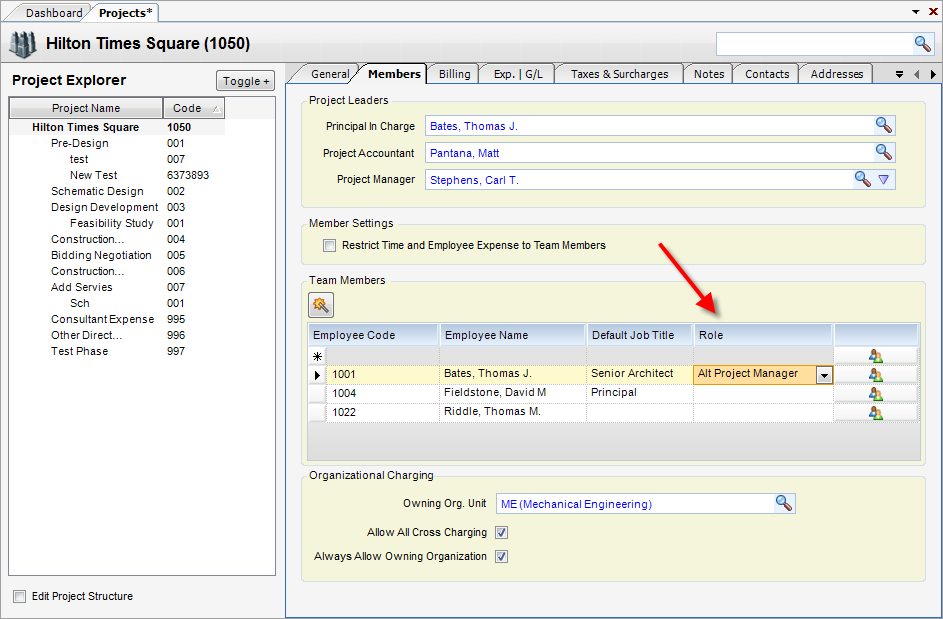
Step 3 - Finally, go to Project Administration / Projects / Members Tab. (Fig.4) Add the Employee that you would like to have this Project Role in the Team Members box. Next to the employee select the Project Role in the column named Roles. Click Save.