Overview
How to Create a New Report.
The following example of creating a basic custom report titled Employee List will illustrate how Custom Reports work.
Step 1 - Click the New option.
Step 2 - Enter Employee List as the Name
Step 3 - Check the Active box.
Step 4 - Leave Stored Procedure and Data Only unchecked.
Step 5 - Enter the following query - "select empcode, empname from employees order by lastname "
Step 6 - Save the report.
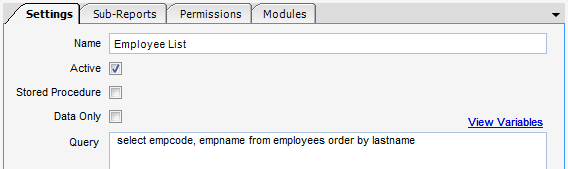
(Fig.1)
Step 7 -While the report has been created, it cannot yet be run because there is no report design. Click the Generate RDL on the toolbar (Fig. 2). When the warning appears, click Yes. If a custom design was previously uploaded, overwrite the design by clicking the Generate RDL button.

(Fig.2)
Step 8 - Click the Preview Report to see the generated report.

(Fig.3)
Step 9 - Before anyone can access the report, two more steps must be completed. First, on the Permissions tab, specify which Users and/or Groups will be permitted to run the report (Fig.4).
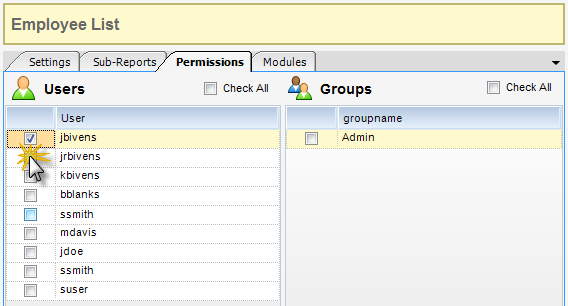
(Fig.4)
Step 10 - After selecting who has access to the report, specify where the report will appear on the menu using the Modules tab (Fig. 5).
Note - a report can be in multiple modules if desired.
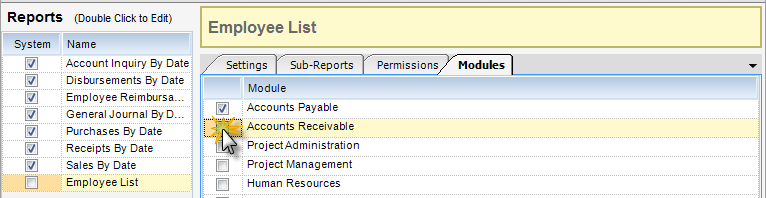
(Fig.5)
Step 11 - Log out and then log in again. The new report will now appear in the Reports container in the Human Resources section. Custom reports have an icon on their left (Fig.6).
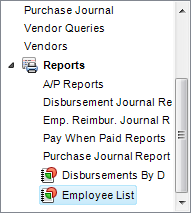
(Fig.6)