Overview
How to use the 1099 form.
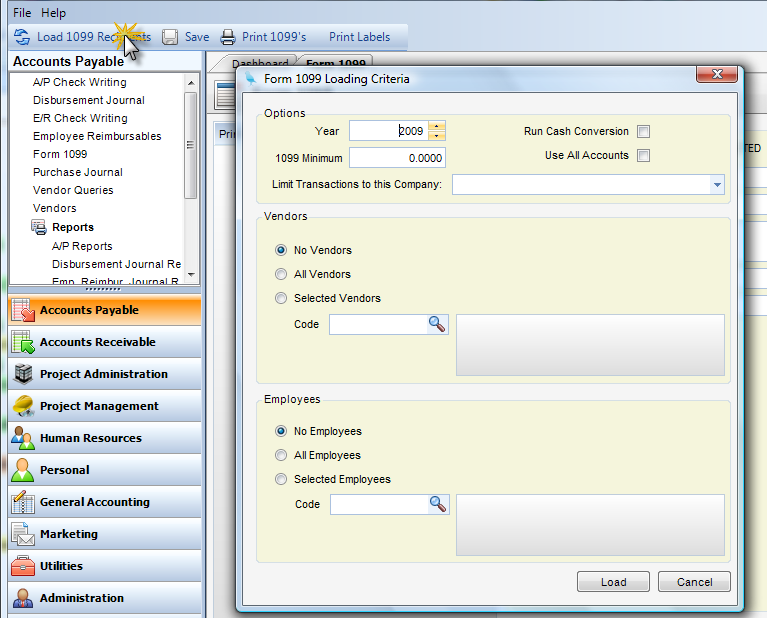
Step 1 - Click the Load 1099 Recipients button. All applicable payees will appear in the main form list box with a check next to them. This means they are selected for printing. Removing the check box will suppress them from printing.
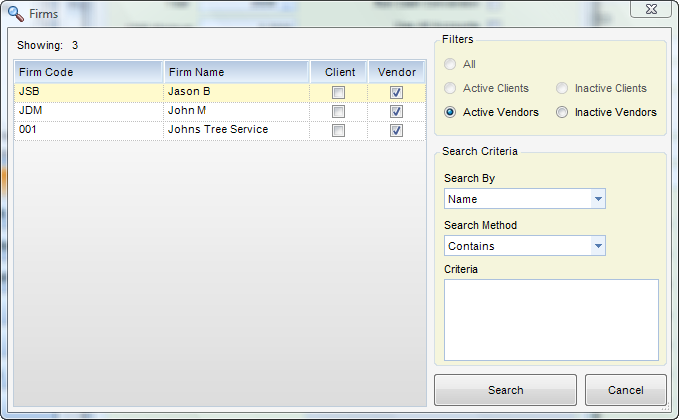
Step 2 (Vendors Criteria) - If you click on a vendor in the list, its information will appear in the right hand portion of the screen. You can change any of the information and then click Update to record. After making any changes, remember to click on Save before printing. Also note that exiting the screen will lose all changes, including saved ones.
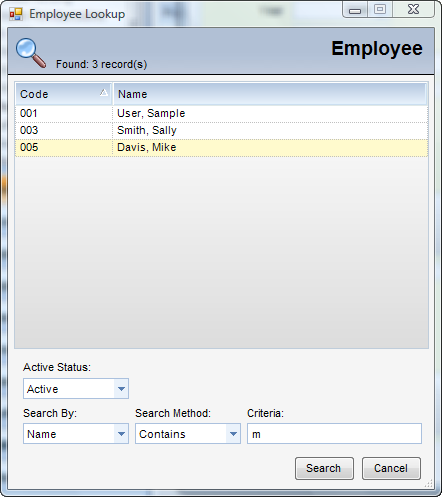
Step 3 (Employees Criteria) - If you click on the Employees Lookup Control, an Employees window will pop-up where you can select individual employees. Double click on the employees you want to select, and they will appear in the box to the right.
Step 4 - Once you have selected all of the appropriate information, click Load. Once you have loaded the Vendors and/or Employees, you can make manual adjustments to individual 1099 forms. Once you make changes, click Update.
Step 5 - Once the forms are prepared, click Print 1099's from the toolbar.

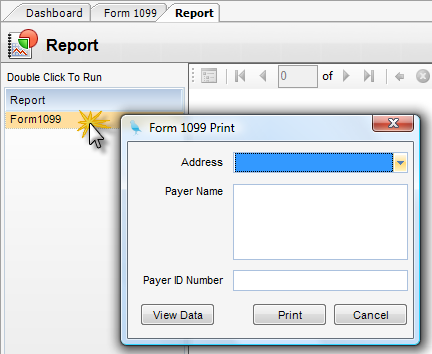
Step 6 - Double Click on Form 1099. When you preview the report, you will receive a prompt for address, payer name, and payer ID number. The address will be a list of your company addresses from global settings. Select an address. The payer name is typically your company name. Payer ID is your federal EIN. Click Print to view the 1099 forms.
Note: If you are not using windowed envelopes, you can print labels by selecting 1099 labels from the toolbar.