Description: How to Post a Retainer. A retainer fee is a fixed amount of money that a client agrees to pay, in advance, to secure services. Below are the steps to entering a retainer in InFocus.
Note: All system invoices support Retainers and Retainage. If you have a custom invoice design, make sure that is supports Retainers and Retainage.
Step 1 - You have to enter a manual invoice. Once you receive the retainer, you will make two journal entries. First, go to the Sales Journal and enter the appropriate information in the Header and Detail sections. Click Save. This entry creates the retainer in the system and associates it with a client / projects. In a sales journal, the A/R portion is entered in the header and the retainer as a line item.
Note: The G/L Account is a retainer account (Fig. 1) and the suggested Invoice Number is "Advance & Date" so that an invoice number is not taken up by the retainer.
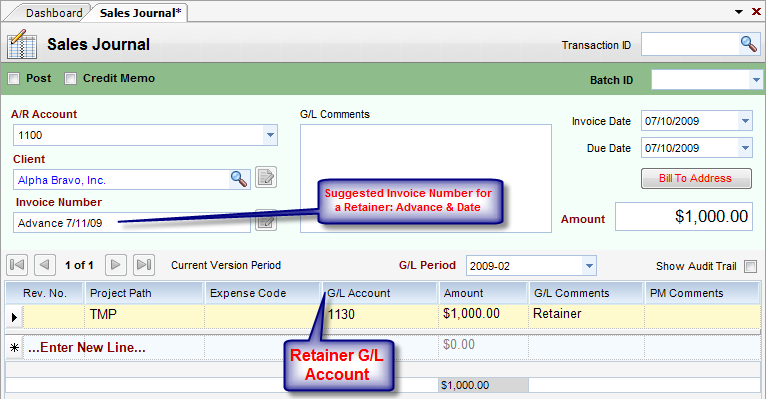
(Fig. 1)
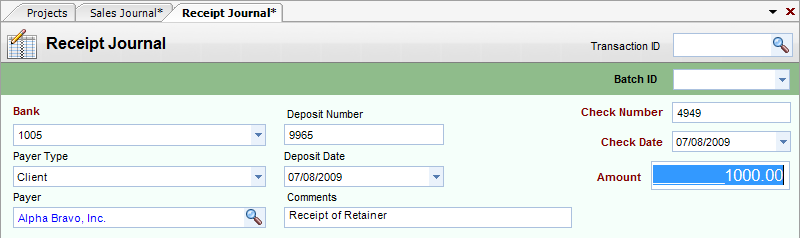
Step 2 - Immediately enter a cash receipts journal as follows: Go to the Receipts Journal and enter the appropriate information in the Header section.
Note: This entry records the cash and clears out the receivable (invoice number used above must be reference in the transaction line.
The net effect is an increase in cash balance and recording of a retainer as a credit. In a cash receipt, the cash is entered in the header and the retainer as a line item.
Note: Step 3 has two options: Manual entry or Client Invoice Wizard
Step 3 - Option 1 (Manually) - Now move down to the Detail section of the Receipts Journal and enter the appropriate information. Click Save.

OR
Step 3 - Option 2 (Client Invoice Wizard) - Now move down to the Detail section of the Receipts Journal and click on the Wand icon ![]() . This will open the Client Invoice Wizard. Select the appropriate A/R Account and Invoice Number. Choose Spread or Pay Off.
. This will open the Client Invoice Wizard. Select the appropriate A/R Account and Invoice Number. Choose Spread or Pay Off.

Click Apply and the information will fill in the Detail section of the Receipts Journal. Click Save.

Note: Steps 4-6 are done when you are ready to apply the retainer to the project (This may not be the same time that steps 1-3 are completed).
The system will create the appropriate sales journal to apply a retainer if automated invoicing is used to post.
Step 4 - Go to the Project Administration Module. Choose the Projects Applet. Pull up the Project to which you would like to post the retainer. Click on the Billing tab. (Fig.2)
Step 5 - Enter the Retainer amount you wish to apply (Does not have to be all at one time) and click Save.
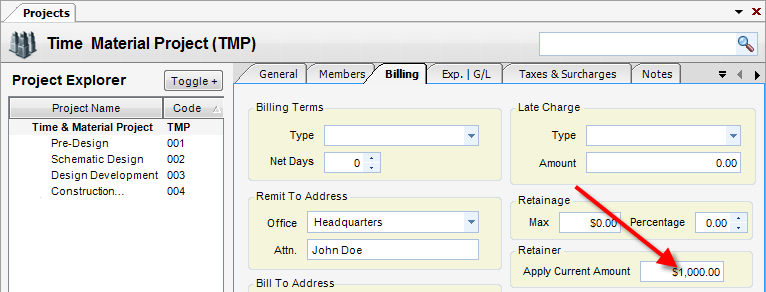
(FIG.2)
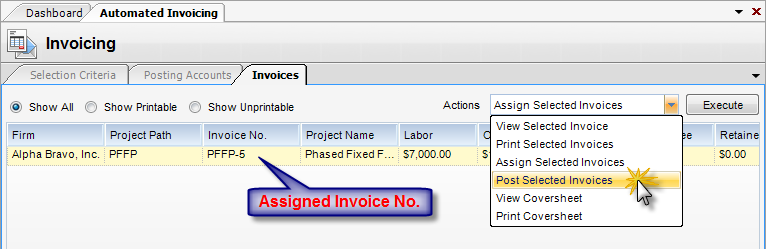
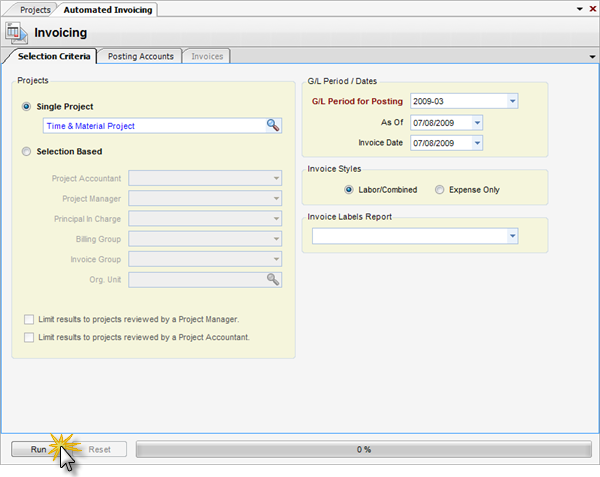
Step 6 - Now go to the Accounts Receivable Module/Automated Invoicing. Pull up the Project the retainer was applied to (see step 5) and click Run.
Step 7 - The retainer has now been applied and appears on the Invoicing tab under the Retainer column.
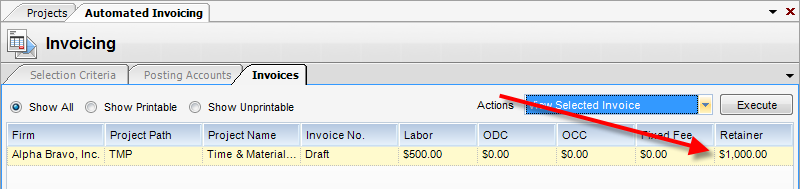
Step 8 - To post the retainer, click the Actions dropdown box. Select Assign Selected Invoices to assign them an invoice number. Then, select Post Selected Invoices to post them to the Sales Journal.