Overview
Resource Schedules are entered against allocations. They may be scheduled against individual vendors or against no particular vendor by using the General Vendor name.
Note: All Project Planning entries "Auto-save" once you leave the field. This eliminates having to save individual sections.
Schedule Toolbar - The resource schedule window has its own toolbar. Below are descriptions of what each of those items do.
![]() Column Chooser - By clicking on this button, a window will appear that allows you to select the columns that you would like to see in your Project section. See Add Columns for more details.
Column Chooser - By clicking on this button, a window will appear that allows you to select the columns that you would like to see in your Project section. See Add Columns for more details.
![]() % Wizard - By clicking on this button, a window will appear that allows you to schedule an employee by percentage. See Scheduling an Employee by Percentage for more details.
% Wizard - By clicking on this button, a window will appear that allows you to schedule an employee by percentage. See Scheduling an Employee by Percentage for more details.
![]() Timeline Button - This button expands/collapses the Timeline.
Timeline Button - This button expands/collapses the Timeline.
Start Date - The start Date of the Timeline.
End Date - The End Date of the Timeline.
Data View Mode - Day, Week, Month - The "buckets" of units displayed in the Resource Schedule grid. The timeline displays up to 120 units of the selected Mode (ie. 120 days).
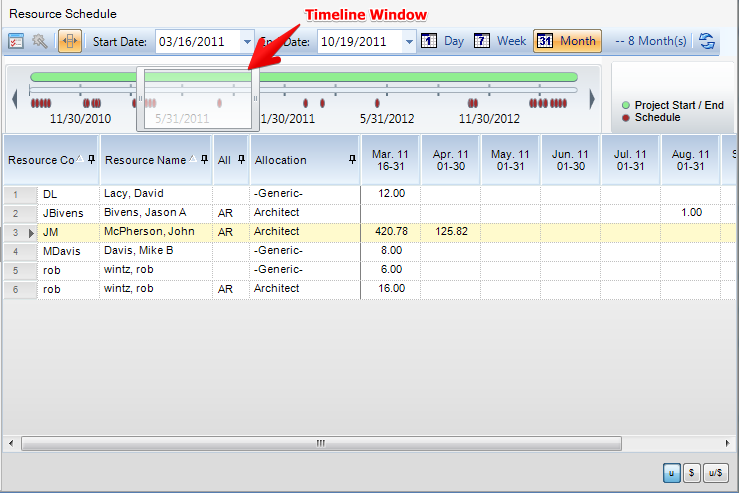
Timeline / Timeline Window - The Timeline has an adjustable “Timeline Window” (Fig.1) that allows you to move and adjust the time frame of the data you are viewing in the schedule window. It also shows you the entire timeline of the project, start to finish. All resources represent a dot on the timeline letting you see if there are any resources scheduled anywhere throughout the life of the project. Both Actuals and Baselines can be shown on the timeline by going to Toolbar > Edit > Preferences > Schedules. There, you can click “Include Actuals” and “Include Baseline”. There is a legend on the right of the timeline. The dots are color coded to allow you to differentiate between schedules, actuals and baseline data.
![]() - Refresh - Refreshes the currently loaded data.
- Refresh - Refreshes the currently loaded data.
![]() By clicking on these buttons, you change what you enter. u = Units (Hours), $ = Dollars, u/$ = Units and Dollars.
By clicking on these buttons, you change what you enter. u = Units (Hours), $ = Dollars, u/$ = Units and Dollars.
Note:
When Scheduling in Labor Mode:
The Labor Mode is used to schedule labor resources. Resource Scheduling is always made at the lowest level of the WBS. Clicking on the bottom node of the WBS, and the appropriate Allocation Job Title activates the Labor Resource Scheduling Window and allows the user to enter schedules for the selected WBS.
| When Scheduling in ICC, ODC, or OCC Mode: |
| Resource Scheduling is made at the expense code level. Resource Scheduling is always made at the lowest level of the WBS. Click on the bottom node of the WBS, and the appropriate Allocation Job Title to activate the ICC, OCC, or ODC window, and then enter allocations and schedules for the selected WBS. |